If you have found an existing video online, you can skip these first two steps.
Step 1: Getting the video file
As mentioned above, you’ll often need to start by making the decision where you’d like the video to be uploaded to. Getting to that point is a little different depending on which tool you used to create your video:
If you used Echo360 Universal Capture, the app will give you the option to upload to the Echo360 ALP platform – useful if you’ve already decided to share content this way with students. See How to book an Echo360 space and/or schedule recordings for your unit for more information about setting up a space in Echo360 for uploading videos to each unit.
The other option when you use Echo360 Universal Capture is to find the recorded file stored on your computer. This gives the option of sharing outside Echo360, combining with other videos or doing further editing. If this is your preference, you’ll need find the video file on your computer – the Echo360 help contains information about file recording locations.
Important: This tool is replaced by Zoom from Semester 2 2021
The link to the "Web conferencing" tool in MyLO will not be available in units commencing Semester 2 2021onwards.
Zoom is the replacement and is available to use from within MyLO (see below).
The tool (and existing recordings) will remain available in 2021 full-year units and past units.
If you recorded a Collaborate session, it will be accessible within the MyLO unit already. You should be able to direct students to view the recorded session. You also have the ability to download the video – this option might be most useful if you wish to use show the video for students not in the unit (e.g. a future delivery). For more information about either option, see the Blackboard Collaborate help page: Recordings.
If you recorded a meeting, you will have chosen either to save the video to the ‘cloud’ (online) or ‘locally’ (on your computer). Either way, you’ll need to locate this file to then share it. It can be tricky to find the recording, but there are some useful Zoom help resources about making and finding recordings.
If you used software and your computer camera to put together your video, you should be able to ‘export’ a final video file. If you shot your footage on a separate camera, and edited it together, the editing software should also have the option to 'export' the video file. This is the file that you will need to upload somewhere so students can view it online.
Don't forget to keep the 'working file' too (e.g. mypowerpoint.pptx), so you can make edits and export an updated video if you need to do so at a later date.
Step 2: Uploading the video file
If the tool you used generated a video file that you then need to upload somewhere, there are a number of options for hosting.
As mentioned above, if you used an Echo360 tool, the software will allow you to upload the file to the 'class' space. However, any video file created with other tools could be uploaded to the Echo360 system.
Echo360 has the advantage of being a University of Tasmania supported system, with licensing considerations covered and a 'single sign-on' experience for students – that is, the videos are private to your students, but if they're already signed into MyLO they won't have to sign in again.
Microsoft Stream is a video sharing platform available as part of the Office 365 package. As staff members, you can sign in with your University of Tasmania account and upload and organise videos.
However, the product hasn't officially lanched within the University yet. At this stage, if you choose to use this, to make your video available to students may be fiddly - you may need to make it visible to all staff and students by checking the option "Allow everyone in your company to view this video". This will make the video available to all, but it means you won't have to add students' names individually to provide them with access.
Another tip with Stream is to consider whether you want to turn off comments.
If you intend to provide a downloadable file to your students (see below), uploading the video file through the MyLO "Manage Files" tool might be a good option. Then, you'll be able to provide students with a link to download it - a good option if they have inconsistent Internet access.
You can also choose to upload through the process of adding a link to a downloadable file (see below)
The University of Tasmania does not recommend YouTube as an option for uploading learning resources for a number of reasons. It is important to note that YouTube is not a centrally supported system, and its use comes with a range of issues such as additional copyright considerations. It is also not integrated with your University of Tasmania staff account (you will have to use a Google account to create a YouTube 'channel' in which your videos are stored).
YouTube might be most relevant if you have reason to share content publicly and on an ongoing basis and are creating videos outside of your University of Tasmania role.
Presenting the video
Whether you found or made a video, the final step in sharing is to consider how it is presented to students as a resource.
Embed in MyLO content
A common way of presenting videos to students is within MyLO Content pages – in this scenario, to “embed” a video means to insert the video so it can be played within a webpage. An advantage of this is the ability to add context (e.g. text preceding the video explaining relevance). It also means that students don’t have to navigate away from the flow of learning content and activities – the video appears as part of the page.
Videos embedded in a webpage are generally 'streaming media' - they are downloaded as the viewer watches them. For students with good connectivity this is fine.
Unless there's a technical problem with this option, embedding your video is a good default sharing option.
Note that if you're using templates and the MyLO Mate tool, you can use the 'sidebar' options to insert some types of videos.
Provide a link
If you have found a video, it is not always possible to 'embed' the video on a MyLO page because some platforms (or settings on individual videos) won't allow this.
One way to direct a student to a video on an existing webpage in this situation is to add hyperlinked text, like this example: So many cute kittens compilation 2018
One reason you might choose to use this approach, is when the video is a supplementary resource which you don't want to appear in the primary flow of content.
To provide a link in MyLO, you will need to be in edit mode on the page where you want the link to appear.
Decide the text which you wish to become the link. Try to make it 'contextual': Do this: "You can watch this video on cute kittens to find out more." Don't do this "You can click here to find out more."
Type the text including the surrounding content.
Select the text which you want to become clickable (in the above example that would be "this video on cute kittens".
Click on the Insert Quicklink button in the menu bar
In the pop-up list, scroll down and select the URL option
Paste the URL (link) text to the webpage where you want to send the students and click the Insert button
Save and close the MyLO Content page.
Provide a downloadable file
Sometimes it is useful to make it easy for students to download content to watch offline (rather that 'streaming' the video at the time of watching it). When unreliable internet access is an issue, this can be a good option.
The first steps are the same as providing a link above, but it's then a matter of linking to a file instead of a webpage:
To provide a link in MyLO, you will need to be in edit mode on the page where you want the link to appear.
Decide the text which you wish to become the link. Try to make it 'contextual': Do this: "You can watch this video on cute kittens to find out more." Don't do this "You can click here to find out more."
Type the text including the surrounding content.
Select the text which you want to become clickable (in the above example that would be "this video on cute kittens".
Click on the Insert Quicklink button in the menu bar
In the pop-up list, scroll down and select the Unit File option
Do one of the following:
If you have already uploaded the file using the Manage Files tool:
Select the video file from the unit files list
Or, if you need to upload the video file:
Click the" Create New File" button and choose the video file from your computer
Save and close the MyLO Content page.
Providing a text alternative
As mentioned in relation to each tool, is is important to provide a text-based resource for every learning resource of a different type (such as an image, video, or audio file). This is an accessibility requirement - ensuring access to the content of the video for the widest possible audience. It often benefits students who don't have any disabilities, but appreciate the alternate presentation of information (e.g. some students have reported appreciating transcripts as they find annotating them helpful).
Common examples of a "text alternative":
Captions for the video(on-screen text) This is a great option if you have found a video which already has captions/subtitles. Depending on how you are sharing your video, you may also be able to add captions to your video by allowing them to be automatically generated, manually entering them, or some combination of the two approaches.
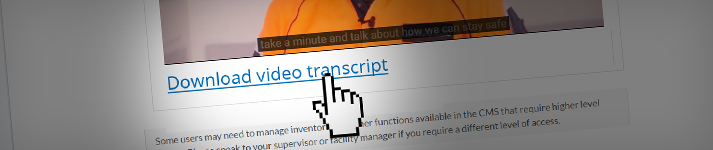
A transcript of the video (e.g. a separate document providing the content of the video) This is logical if you already have a document e.g. if you have recorded a presentation and read from a script, you could provide students
A completely different text-based resource which provides an equivalent learning experience (e.g. if the video presents a case study, you could link to an online article describing an alternate case study conveying the same core content). This might be a good fallback where there are barriers to providing one of the above two options.
This is a new resource and we would appreciate your feedback.