It’s not always possible to find existing videos that fit your needs. You might be wanting to convey very specific concepts, or you might need to show something specific to your context or location. Below are a few approaches and tools that are available for you to create a new video in this circumstance.
When creating any type of video, duration is a key consideration. Consider ‘chunking’ your content into videos of 5-10 minutes wherever possible, rather than thinking of them as a traditional lecture simply captured in a digital format. Other overarching recommendations are succinctly presented in Vanderbilt University’s Effective educational videos.
Sustainability is also important. In planning your videos, try to make the video itself relevant to multiple deliveries. If you have delivery-specific information to convey, consider presenting this alongside the video. An example might be a video introducing an assessment task – you could refer to the “due date” in the video, but only state “September 15” in text below the video in MyLO. Having to record a whole new video to update a single detail can be avoided.
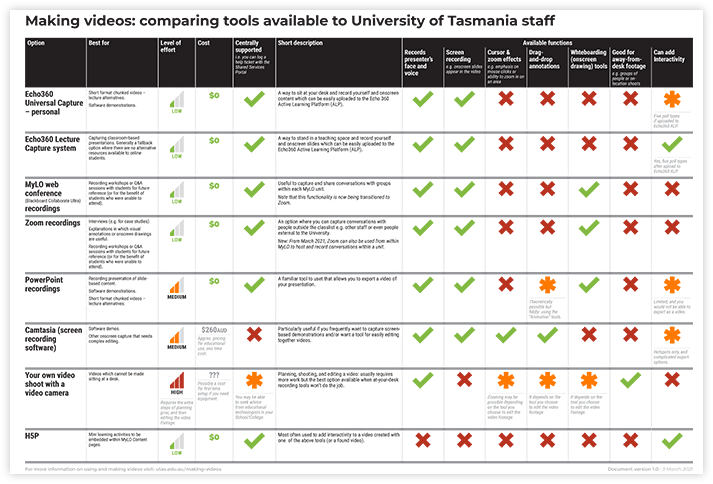
Comparison summary
This printable pdf is a summary of the detailed information below.
Echo360 is a centrally supported tool for the creation of videos. Echo360 Universal Capture – Personal is software that can be installed on your own computer to record your computer screen (e.g. a series of slides or a software demo), concurrently with video and audio. After recording the video, you have the ability for basic editing (trimming the start, end, and sections from the middle if needed). Once complete, you can download the video file for sharing on any platform, or you can share it through the Echo360 ALP platform (see Sharing videos)
Self recording like a pro (The University of Melbourne video) Note that this video recommends both Echo360 Personal Capture (now renamed Echo360 Universal Capture), and a product called Kaltura. The University of Tasmania has a license for the use of the Echo360 product, but not Kaltura.
Because this is centrally supported product, if you have any trouble installing or using, you can contact ITS support through the UTAS Shared Services Portal
Echo360 Active Learning Platform (ALP) - Lecture Capture system
Echo360 ALP is a centrally supported tool for the creation of videos. The Echo360 lecture capture software is the combination of hardware and software available on-campus for the purpose of capturing lecture-based delivery. In the past, this has been used primarily for capturing long-format lectures that were concurrently delivered to large cohorts of students in a physical space. From 2021, lectures are not to be delivered on campus, and teaching staff are encouraged to consider more suitable formats where content is delivered online, so this technology is less likely to be relevant. The technology is still available to be booked for recording of content without students present, but it would be worth considering one of the other alternatives presented here such as Universal Capture. As mentioned in the guidelines, shorter format videos are another key recommendation, and these might be more readily produced using software in your own computer.
Having said that, the ALP system is still an option for sharing videos with students, as videos from any source can be uploaded to the system. See Sharing videos for more detail.
MyLO web conference (Blackboard Collaborate Ultra) recordings
Important: This tool is replaced by Zoom from Semester 2 2021
The link to the "Web conferencing" tool in MyLO will not be available in units commencing Semester 2 2021onwards.
Zoom is the replacement and is available to use from within MyLO (see below).
The tool (and existing recordings) will remain available in 2021 full-year units and past units.
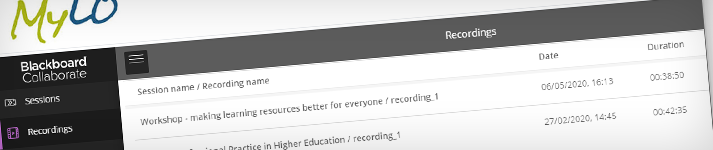
Blackboard Collaborate Ultra is software accessed through the “Web Conferencing” tool in MyLO. The University of Tasmania recommends this tool as the primary option for videoconferencing with groups of students. It is possible to record any session, which is why this is being included on this list.
Self recording like a pro (The University of Melbourne video) Note that this video recommends both Echo360 Personal Capture (now renamed Echo360 Universal Capture), and a product called Kaltura. The University of Tasmania only has a license for the use of the Echo360 product.
Because this is centrally supported product, if you have any trouble installing or using, you can contact ITS support through the UTAS Shared Services Portal
Zoom recordings
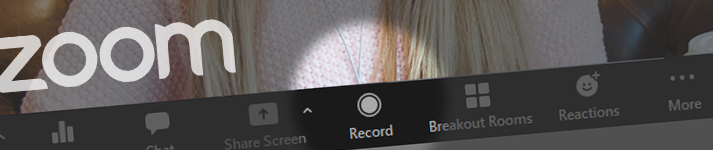
You’re almost certainly familiar with Zoom as a platform for meeting with other University of Tasmania staff, but with the recording functionality, it might also be something to consider when developing learning resources. A couple of the lesser-used features can be an advantage – such as the whiteboarding option. Using this alongside screensharing can be a great way of annotating a slide as you discuss it. Interviews can also be conducted and recorded. Just don’t forget to hit the record button – a surprisingly common mistake!
Explanations in which visual annotations or drawings are useful (e.g. a maths technique, or a process diagram which you wish to highlight as you talk)
What you’ll need
Your computer, with the Zoom application installed and a good internet connection.
A video camera (if you want to record yourself as well as the screen).
A microphone (e.g. headset).
A quiet space.
Optional: if you want to better utilise the whiteboarding and annotating functions, a pen-based input device can be useful. Here are some specific options:
A Wacom tablet and pen if using a desktop computer
Self recording like a pro (The University of Melbourne video) Note that this video recommends both Echo360 Personal Capture (now renamed Echo360 Universal Capture), and a product called Kaltura. The University of Tasmania only has a license for the use of the Echo360 product.
Because this is centrally supported product, if you have any trouble installing or using, you can contact ITS support through the UTAS Shared Services Portal
PowerPoint Recordings
While most teaching staff will be familiar with PowerPoint for the creation and presentation of slide-based content, it now also includes recording functionality. You will need to add in the Recording Tab (which isn’t available by default). The ‘Record Slide Show’ option then enables you to record audio (plus video) of yourself presenting for each slide. You can then generate a video comprising the whole presentation: the slides, plus the audio and video of you presenting.
You will also find some more advanced functionality in PowerPoint’s Recording tab. Of note are the annotation tools – you can draw on slides as you speak. The ‘screen recording’ function provides the same type of functionality as Echo360 Personal Capture: a way of recording what’s happening on your computer screen concurrently with audio if desired. At this stage you can’t concurrently record video of yourself, but this could be added in a second pass using the ‘Record Slide Show’ functionality described above.
Once you have a finished video generated, you can share that file through MyLO or any other platform. See: Sharing videos
An advantage here over Echo360 Universal Capture is that you can keep the PowerPoint file, and make future changes more easily because the content can be recorded in multiple sections (slides). For example, you can just update the audio from a single slide, but keep the rest, and generate an updated video for a second delivery, or a variation.
How to access Office 365 (UTAS resource) (PowerPoint is part of the Microsoft Office 365 Suite, available for free for UTAS staff members).
Self recording like a pro (The University of Melbourne video) Note that this video recommends both Echo360 Personal Capture (now renamed Echo360 Universal Capture), and a product called Kaltura. TheUniversity of Tasmania only has a license for the use of the Echo360 product.
Because this is centrally supported product, if you have any trouble installing or using, you can contact ITS support through the UTAS Shared Services Portal
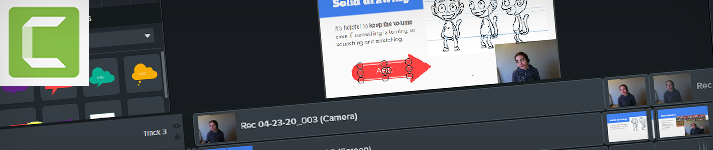
Screencasting software such as Camtasia
Screen recording (often referred to as ‘screencasting’) software is essentially an alternative to Echo360 Universal Capture – Personal: they are a way of recording what’s happening on your computer screen. Some can concurrently capture video and audio. Some of the online apps have functions unavailable in Universal Capture. These include:
Enhanced editing functionality: e.g. ability to record multiple segments and combine, ability to zoom or crop video
Ability to augment the visual elements (e.g. add onscreen notes, visible click effects, enlarged cursor or more
There are free options, but the paid options are often more user-friendly and/or have extra features.
Some of these apps have the added advantage of being able to be used for video editing. So whether you want to edit together multiple screen recordings, or cut up a video that you have shot yourself (See Your own video shoot with a video camera below), this type of software can be a good value option.
If using this software, it’s a very good idea to keep the ‘working files’ – that is the project files saved in the application, in addition to the video that you have exported for sharing. Due to the capacity for combining multiple elements, this allows you to revisit and update a section in a future delivery.
Software demo videos – if demoing how to use a piece of software, cursor effects such as a visible click can be particularly useful.
Animated gifs – Sometimes it’s useful to have a moving image to illustrate a concept in the context of a webpage (e.g. MyLO content). Scroll down on the MyLO Mate UTAS webpage for an example of this approach.
What you’ll need
Your computer
A video camera (if you want to record yourself as well as the screen)
A microphone (e.g. headset)
A quiet space
Cost
The cost of these apps is variable. Camtasia as an example is a one-time cost of around $380AUD and can capture, edit and export videos.
Self recording like a pro (The University of Melbourne video) Note that this video recommends both Echo360 Personal Capture (now renamed Echo360 Universal Capture), and a product called Kaltura. The University of Tasmania only has a license for the use of the Echo360 product.
It depends on which app you choose. Here are the Camtasia tutorials as an example.
Your own video shoot with a video camera
Sometimes you might want to shoot a video that can’t done sitting in front of your computer. You may need to show full-length people and/or close-ups of real objects or actions. Maybe you need to show the environment or equipment. This can generally be captured with a modern smartphone and minimal equipment, but the added complication is in the planning and editing of footage. Your College may also provide supporting equipment, facilities or advice, especially if you have Educational Technologists available. Below are some general guidelines and tips that will help in many situations.
A key principle to keep in mind is to keep your ‘working files’ as well as the final video. Keeping the original footage that you shot, and the editing file (e.g. Adobe Premiere, Final Cut Pro, or Camtasia).
Needless to say, if you’re shooting a live video with multiple people, you will need to follow Covid-safe guidelines including social distancing.
Example uses
Practical demonstration
In-person interview (this can be as a case study, but it can also be an engaging way of presenting information – think of science documentaries in which a range of experts provide information through questioning).
Orientation walkthrough of a physical location
Role-playing a scenario
Explanation of a concept as a substitute for a face-to-face class/tutorial/lecture
Most importantly, before you begin, it’s worth pinning down why you are creating this video, and how you can plan to structure the content to best support learners. As mentioned above, this is a great guide to review: Effective educational videos (Vanderbilt University)
Here is a key prep checklist:
A written plan for the content of the video: this might be your list of talking points, a full script, or list of questions (if you are using an interview format).
A document to plan the ‘shots’: this could be a storyboard and/or shot list. If you’re planning to shoot a demo of a technique or other content where visual explanation is core, pay particular attention to the angles that you’ll need to capture (e.g. close-up of hands performing a task). This will help inform whether you need additional helping hands for the shoot.
Run sheet: a schedule for the shoot. Particularly helpful if your shots will be recorded out of sequence.
Confirmation from participants: do you need other people to help with the equipment, or to be on camera? Make sure they’ve confirmed and don’t forget to send calendar invites.
Consent forms: search the University website for the up-to-date “Personal Information Consent Form” or “Talent Release Form”. Complete this for any on-camera (or voice) ‘talent’.
Booked location(s): have you considered where and when you will shoot the video? Do you have permission to use the space(s)? Make sure to book any space for at least an extra 30 minutes before and after to allow time for setup and pack up.
Feedback: Make sure to sense-check your plan with a colleague or critical friend. Consider talking to educational technologists in your College if available.
Equipment tests: if possible, try a few experiments with the camera and microphone you intend to use. You might find you have to adjust the plan (e.g. the microphone might pick up too much noise if you’re shooting outside, or you might find the lighting flickers).
There are clearly many variables specific to the type of content you are capturing, but here is a great general overview with plenty of tips such as how to ‘lock focus’ so the video doesn’t keep refocusing when your subject moves: Tips on shooting with a smartphone (University of Sydney)
What you will need:
Try contacting the educational technologists in your College if you need any equipment or advice.
A camera (ideally check that the device can shoot at least in ‘Full HD’ which is 1920x1080 pixels). Some options include:
A modern smartphone or tablet
A video camera
A digital SLR camera that can shoot video
Something to hold the camera steady, some examples:
A tripod – this could be a standing tripod, a tabletop tripod or a grip-tripod
If using a smartphone or tablet as a camera, you’ll need a special “smartphone tripod mount” or “ipad tripod mount” (a basic one might be $20)
Optional: a separate microphone to improve the quality of audio (this is particularly important if the camera is a fair distance from the subject). The sound quality is often more important than the visuals. You can search for “on-camera microphone” or “microphone for iPhone” or “microphone for android” to find something right for your camera. There are decent options which would generally cost around $100.
A way to get the footage onto your computer
A USB cable, or;
A card reader (many laptops have SD card slots in the side, which is a common camera memory format, or you might need to buy a separate ‘card reader’”
Light! Good light can’t be overrated. The easiest option is natural light. If using artificial (indoors) lighting, make sure to do a test to make sure there’s no flickering in the video – this is very common with modern LED lights. If natural lighting won’t cut it where and when you have to shoot, you could consider investing in some ‘continuous LED lighting’ panels, but it’s a cost to be avoided if possible (a single good adjustable light plus a basic light stand might be $300).
Editing is potentially the biggest hurdle if shooting your own video: organising the raw footage to produce a succinct and relevant learning resource. If you have captured a relatively simple single shot, this might be as simple as trimming the start and end, and maybe some parts in the middle. However, if you have multiple shots from multiple angles, this might mean dropping that footage onto a single timeline, deciding the sequence, and making multiple trims. Sometimes you may also want to bring in onscreen annotations, slides, or graphical elements in between shots. Maybe you also need to break up the footage into multiple videos.
Once you have downloaded your video footage from your camera onto your computer, you’ll need to work out what software you’ll use to edit it. Below are just a few of the many options available.
Tip #1: Name your footage
When you download your files from your camera(s), start by naming the files logically (e.g. “apparatus close-up” and “intro talk”). This will help you know what you’re dragging around a timeline.
Tip #2: Keep your working files
Like with any work-in-progress, you’ll need to save your ‘working’ file in the format used by the video editor you use (e.g. pptx for PowerPoint). When you have finished and exported your final video for sharing (e.g. a .mp4 file), it’s important to also keep the ‘working’ file in case you want to go back and make updates at a later date.
PowerPoint
If you have a simple sequence of shots to put together, PowerPoint is technically one way to do it using software that you already have access to as a University staff member. You could place each recorded shot on a slide and then use the export video function. However, this doesn’t allow trimming or more complex edits.
Echo360 Universal Capture
Mentioned above as a method of capturing video, this centrally supported software can perform the simple task of ‘trimming’ the video. You can upload a video shot on your own device to do this. Once complete, you can share the video with students through Echo360, or download the file and use another method (see Sharing videos for more details).
Unfortunately this editor doesn’t allow the ability to combine multiple shots.
Camtasia
Mentioned above in relation to capturing on-screen demos, this paid software is a pretty great editor that is relatively quick to learn considering what you can do with it.
This ‘open source’ software is a free alternative with similar editing functionality to Camtasia: you can easily add shots together, trim them and add other elements in, then export to common video files.
Available for free on an iPad or Mac, you might already be familiar with this video editor. If you’re shooting using an iPad anyway, it’s particularly easy to then insert the shots and organise them. Relatively easy to use, iMove allows you to trim footage, combine shots, and add in elements like slides.
If you work or teach in a creative field, you might already have a paid subscription to Adobe Creative Cloud (the package including with Photoshop, Illustrator and other design-based software). If so, you have access to Premiere Pro – a professional level editing program.
Premiere Pro is a video editor used by professionals, so it is incredibly powerful, but it comes with a steeper learning curve. If you are already familiar with Adobe software and/or are adept at learning new software, this might be the best option for you. If you are comfortable with this option but do not yet have the software, you can log a “request to access Adobe Cloud CC” through the UTAS Service Portal. Make sure to communicate the value of this subscription (e.g. a series of videos which you will produce).
H5P is a tool to build interactive content that can them be embedded in webpages (including MyLO content). These can be useful as in-context learning activities. While it's not specifically a tool for making videos, it's included on this list because it includes many options for augmenting video resources, or even providing alternatives. The H5P Examples and Downloads page shows the range of options available; the "Interactive Video" template specifically allows you to add mini-activities (such as quiz questions or drag-and-drop tasks) at specific points in a video. Exploring some of the other templates may give you ideas for alternatives to video-based content.
To create in-context mini learning activities within MyLO content
What you’ll need
It depends on the type of interactive you're creating. You might need to start with a video, some images or other existing content. Explore the H5P Examples and Downloads page for more information.
Helpful Resources
You'll need to start by creating an H5P account using your University of Tasmania account. The University website provides instructions in this webpage: What is H5P. Following these instructions is different to simply going to the H5P website and signing up to a free account: you will have benefits related to the University subscription including the option to share and collaborate on resources with colleagues.
This is a new resource and we would appreciate your feedback.